
How to vibe code iOS apps
A practical guide to going from idea to an app on your phone.

Since writing my last article on how far vibe coding has come over the past year, a few folks have asked how you actually build iOS apps, and how the process differs from vibe coding web apps. It’s very similar, just a bit more finicky. In short, you need to add Xcode to your stack.
I’ll walk through the full process below, from setting up a project in Xcode to getting a working app on your phone. If you’ve vibe coded before but never built for iOS, this should get you there.
1. Download Xcode and set up the bones of the app
You can download Xcode from the App Store on your Mac and once it’s installed, you want to create a project for your app here first.
Once you fire Xcode up, select “Create New Project,” then select the iOS tab at the top and choose “App.”
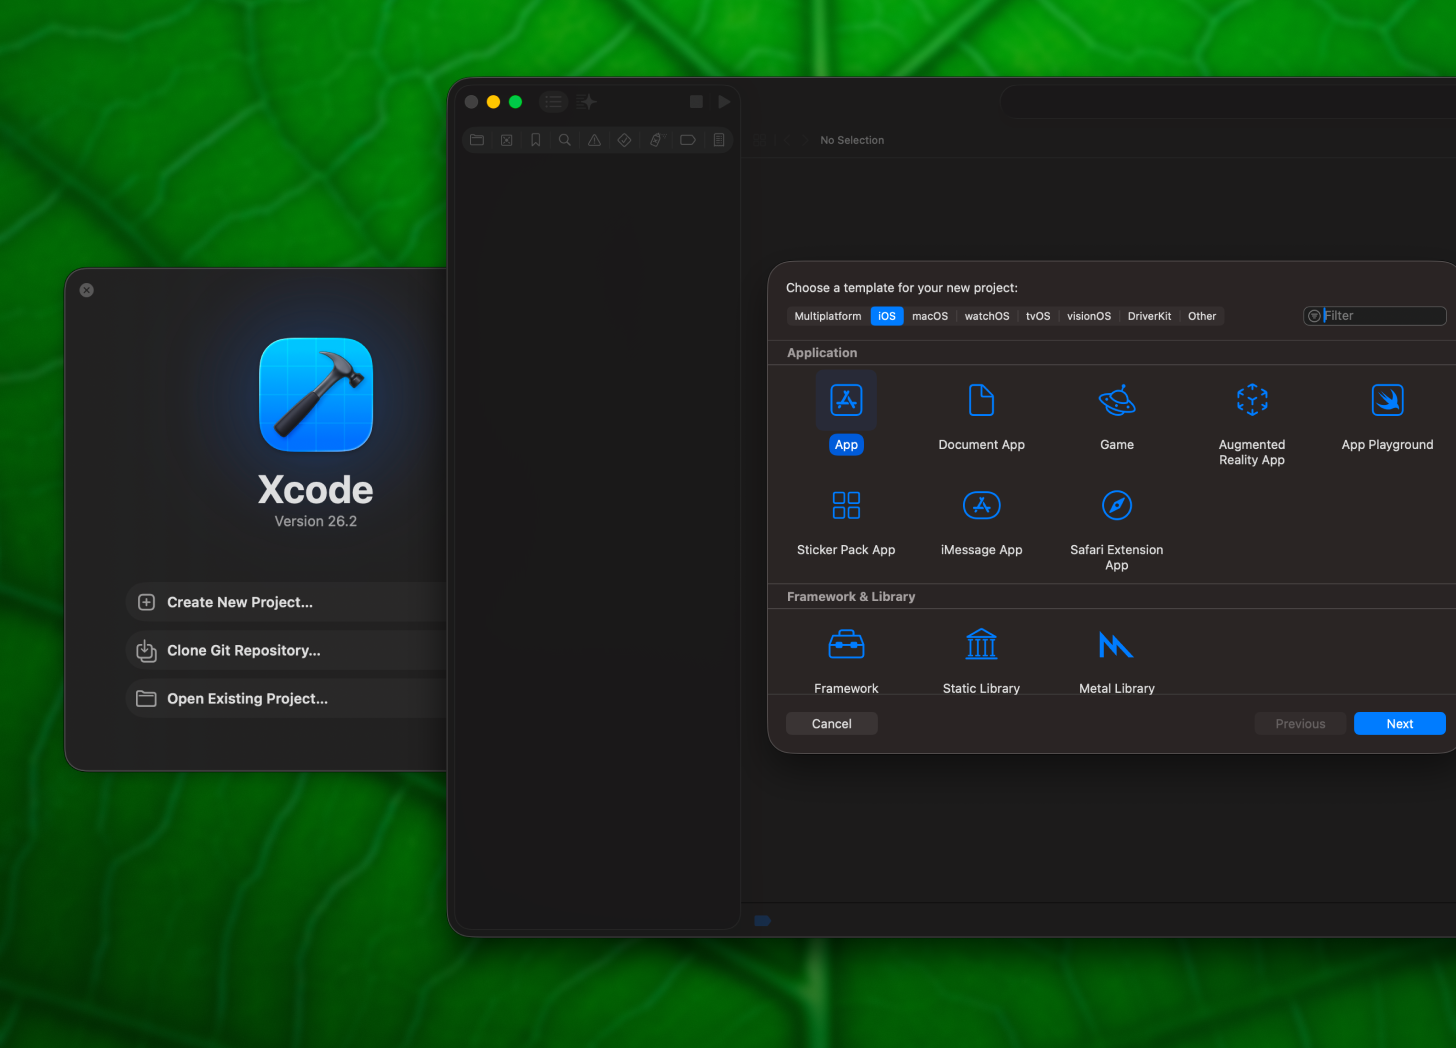
Then you need to fill out some information about your app: the name of the app (you can change this later if you need to), your team (you will need to log in with your Apple ID) the Organisation identifier (needs to be the reverse domain format, something like “com.yourname”, though you don’t need to actually own this domain) the interface (select SwiftUI), the language (Swift), and testing and storage (select none for each).
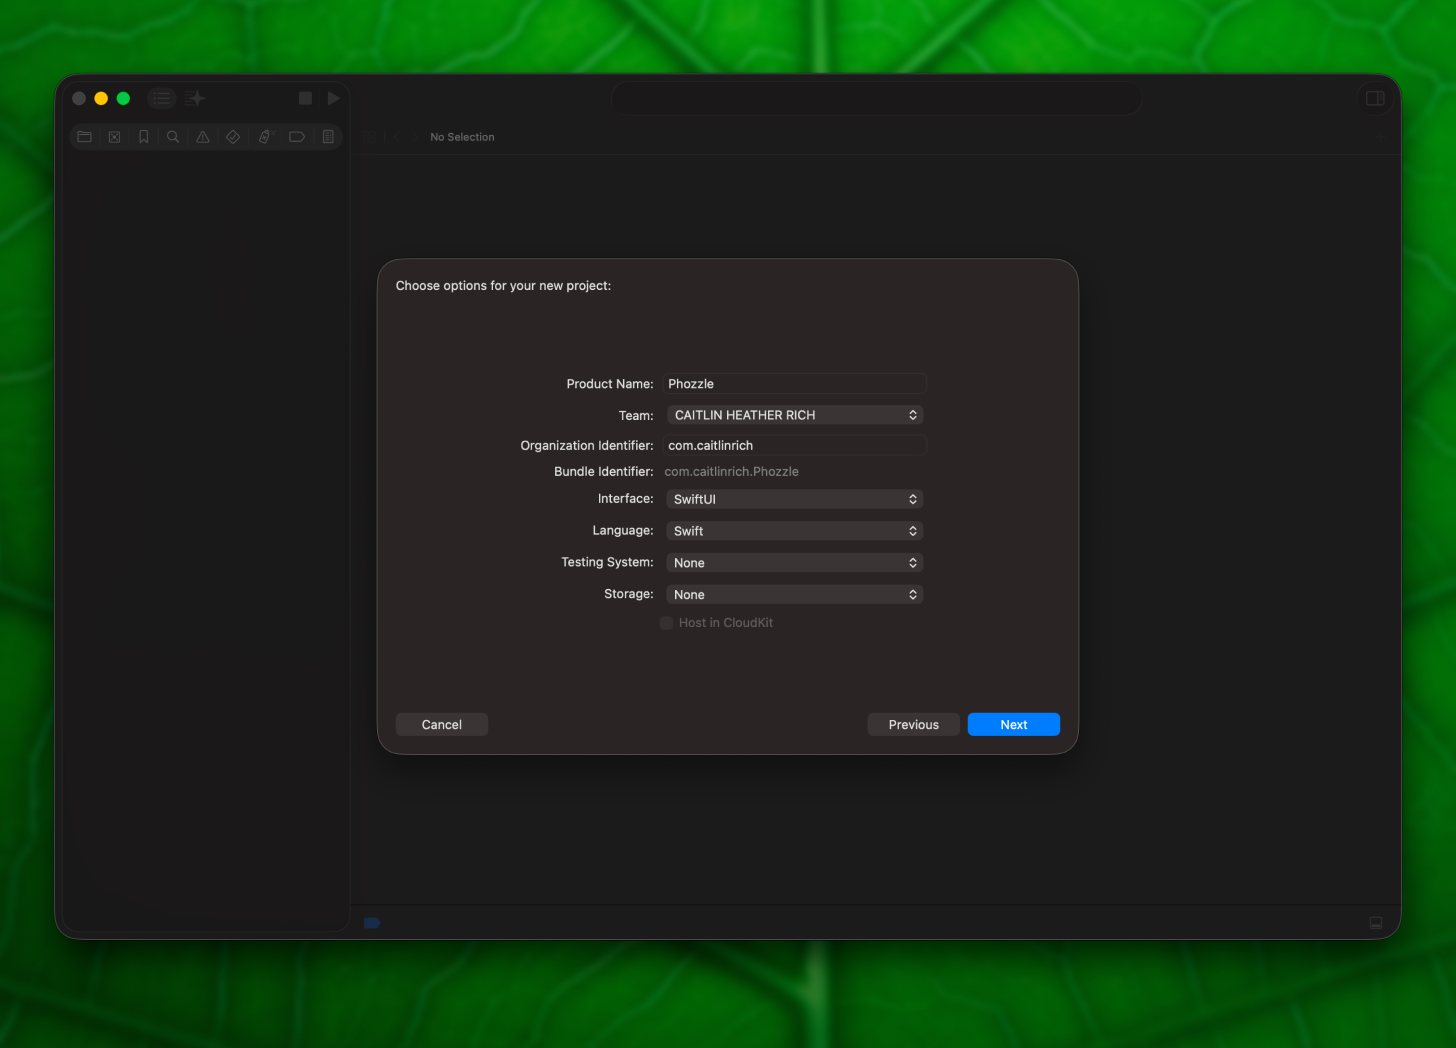
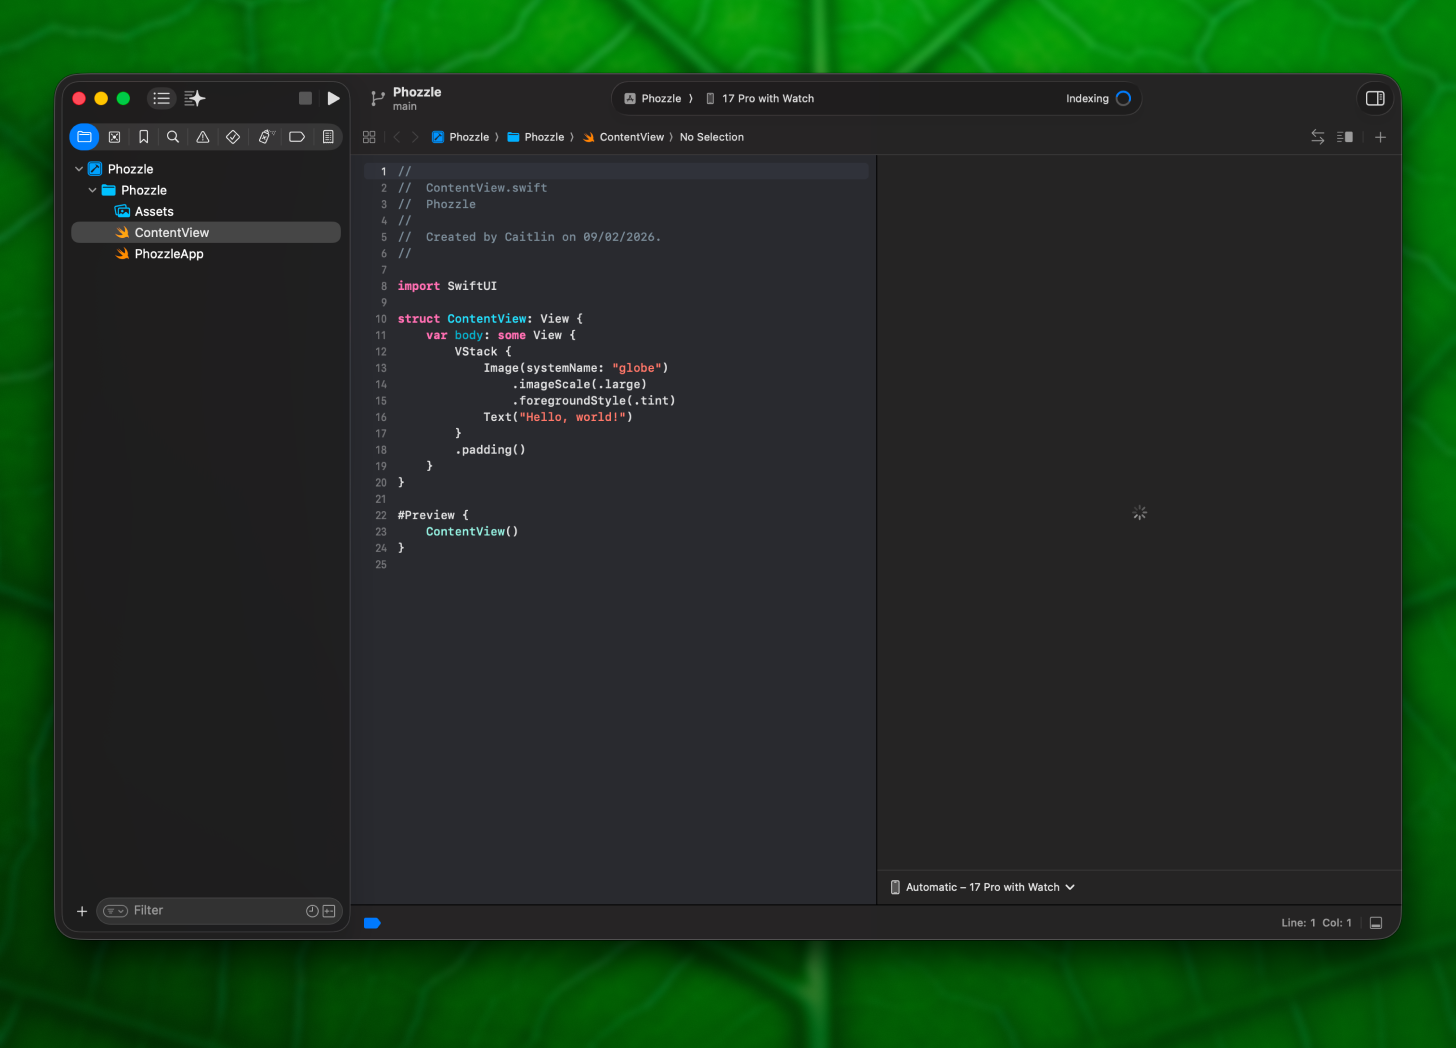
Select next, choose a folder on your computer where you want to save your files, hit “Create,” and you’ll see the bones of an app appear in Xcode.
2. Write a product requirements document
Now that you have the base app set up, it’s time to define what you’re actually going to build.
For this step, you can use any AI chat tool you like: ChatGPT, Claude, Gemini, or you can go straight into your IDE (code editor) and use Cursor, Claude Code, or Windsurf, or in this tutorial, I’m going to use Codex. After opening it, I’m first going to select the same folder that Xcode just created.
The idea for the app I’m going to build is pretty simple. I have so many photos on my phone of friends, family, my partner, and so many travel snaps I’ve taken over the years that I never really look at. So I’m going to build a simple puzzle game that randomly selects a photo from my camera roll, splits it into puzzle pieces, and lets me put the pieces together, and I will then be able to put the pieces together to reveal the photo.
The prompt I used to kick off this process was: “Create a product requirements document to create an iOS app that takes random photos from your phone and then splits this up into a puzzle that you have to solve by dragging and dropping the puzzle pieces into a frame that then snap together to reveal the photo. Ask me as many questions as you need in order to get the requirements.”
Not a very elegant prompt, though the “ask me questions” part is key. Codex then asked me a bunch of questions to help understand more detail about what I was trying to build, and honestly, a lot of them were good questions I hadn’t really thought through. It pushes your thinking.
Things like: Who is this app for? How should the puzzle grid work? How should the random photo be selected? Should there be a timer or scoring system? What should the puzzle look like before you start solving it, jagged pieces or square? What should the reveal be like? How is it monetised? Should users be able to save and share? What’s the tech stack? For most of these, I opted to keep it simple, though it was a great way to get to a solid baseline.

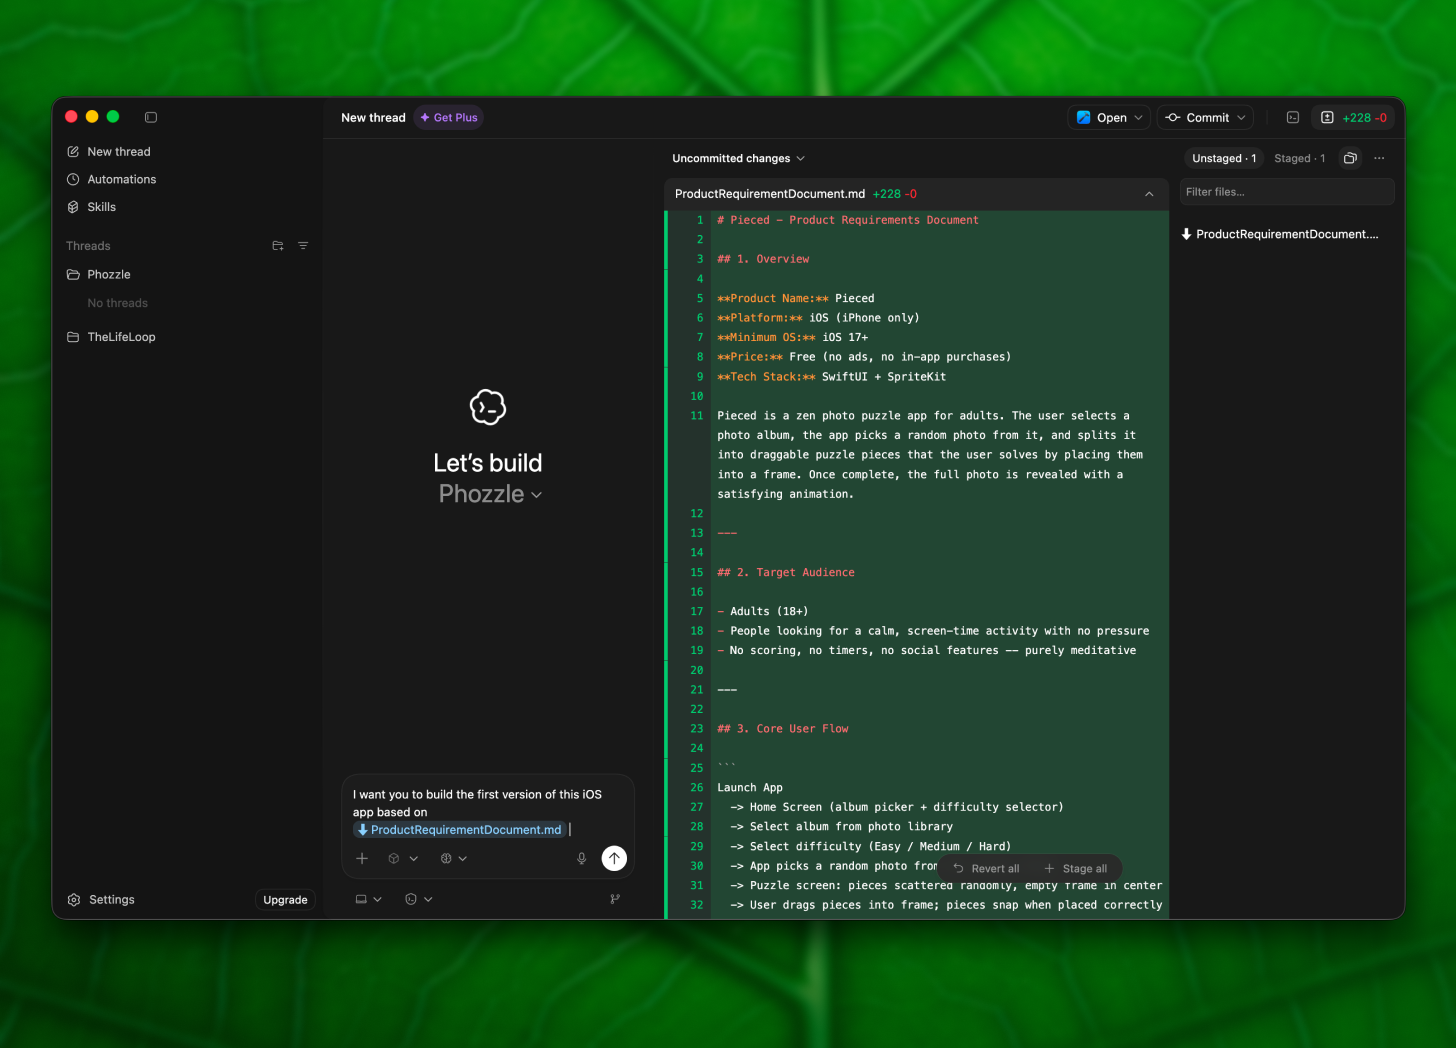
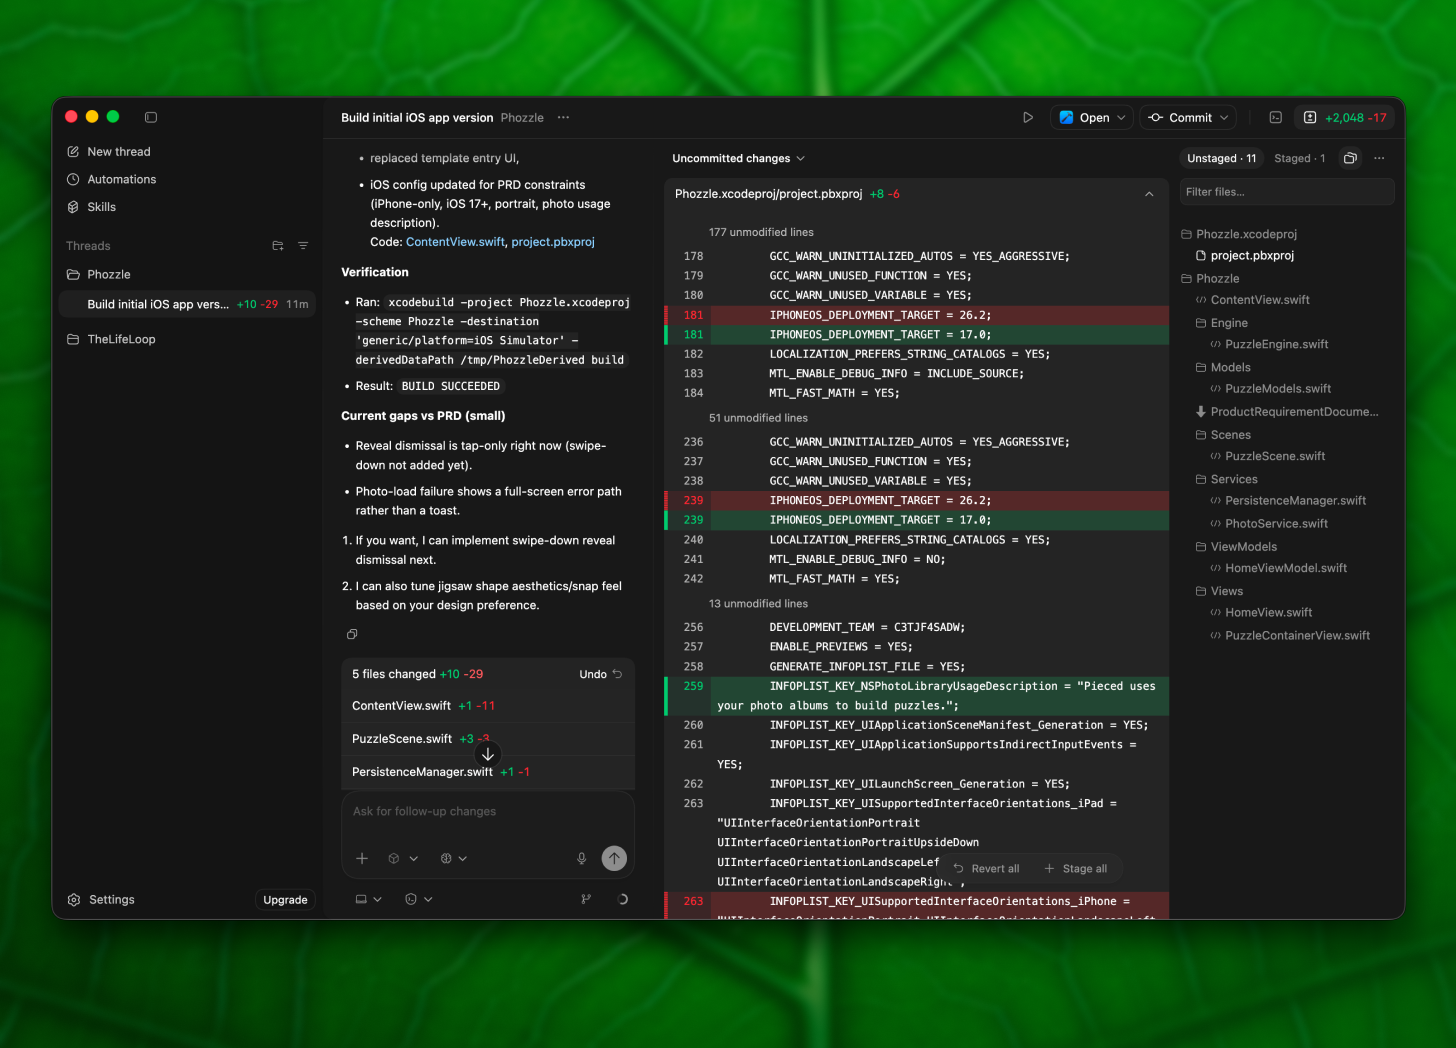
Once I’d answered a bunch of questions, Codex created a markdown file in my folder called “ProductRequirementsDocument.md” with all the details to get us started. If you created your PRD in ChatGPT or Gemini, copy and paste the results into a new file ending with .md (for markdown) somewhere in your folder.
3. Get the agent to build it
Now that you’ve got a decent amount of information about what you want to build, it’s time to let the agent loose.
I started a new chat in Codex and entered the prompt “I want you to build the first version of this iOS app based on @ProductRequirementsDoc.md.” (by typing @, it will bring up your files for you to select the PRD). Then set it to work.
You’ll see it thinking and processing, and eventually it will start writing a bunch of code. Once it’s done, it’s time to check out your app.
4. Preview it in the simulator
Head back over to Xcode, which should now be filled with all the files your agent has created, as they are both working from the same folder.
To see how your app works, press the play button in the top left of the toolbar, or go to the menu and select “Product” and then “Run.” You might need to select what device you want to preview on, which you can choose from a dropdown next to your app’s name in the top centre of the screen.
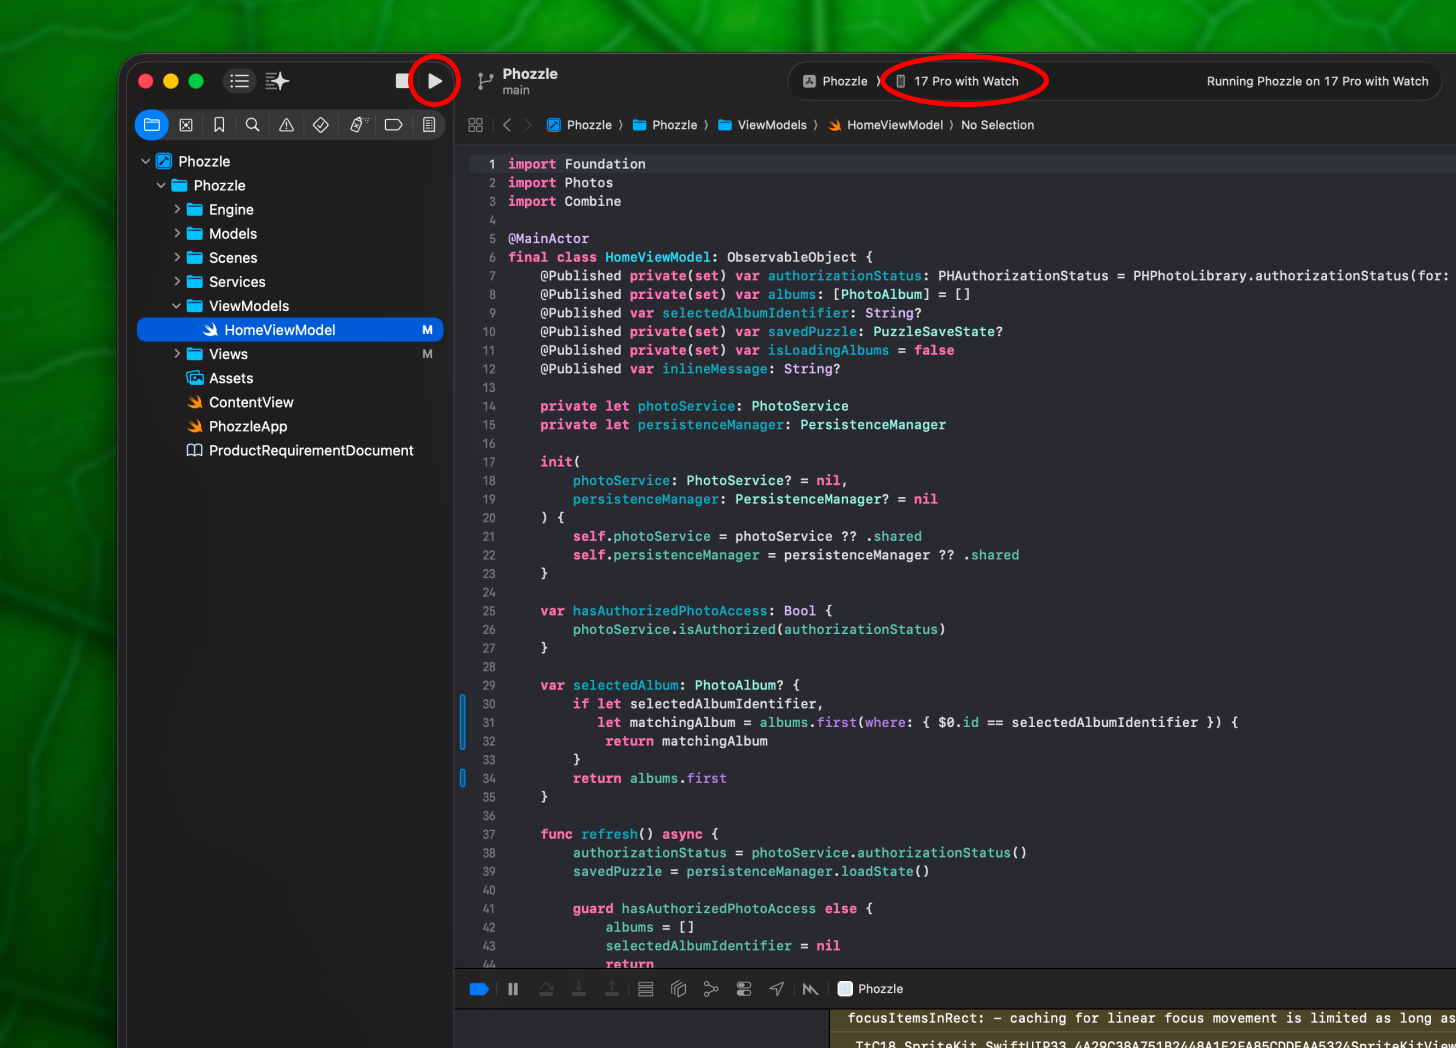
Hopefully your app will build without any issues. If you see a red warning icon and a “Build failed” modal, click on the icon to see what errors have occurred. You can screenshot the error window and give it to the agent in Codex (or whatever you used to build the app) to fix.
If all goes well, a simulator should open and you’ll be able to preview your app.
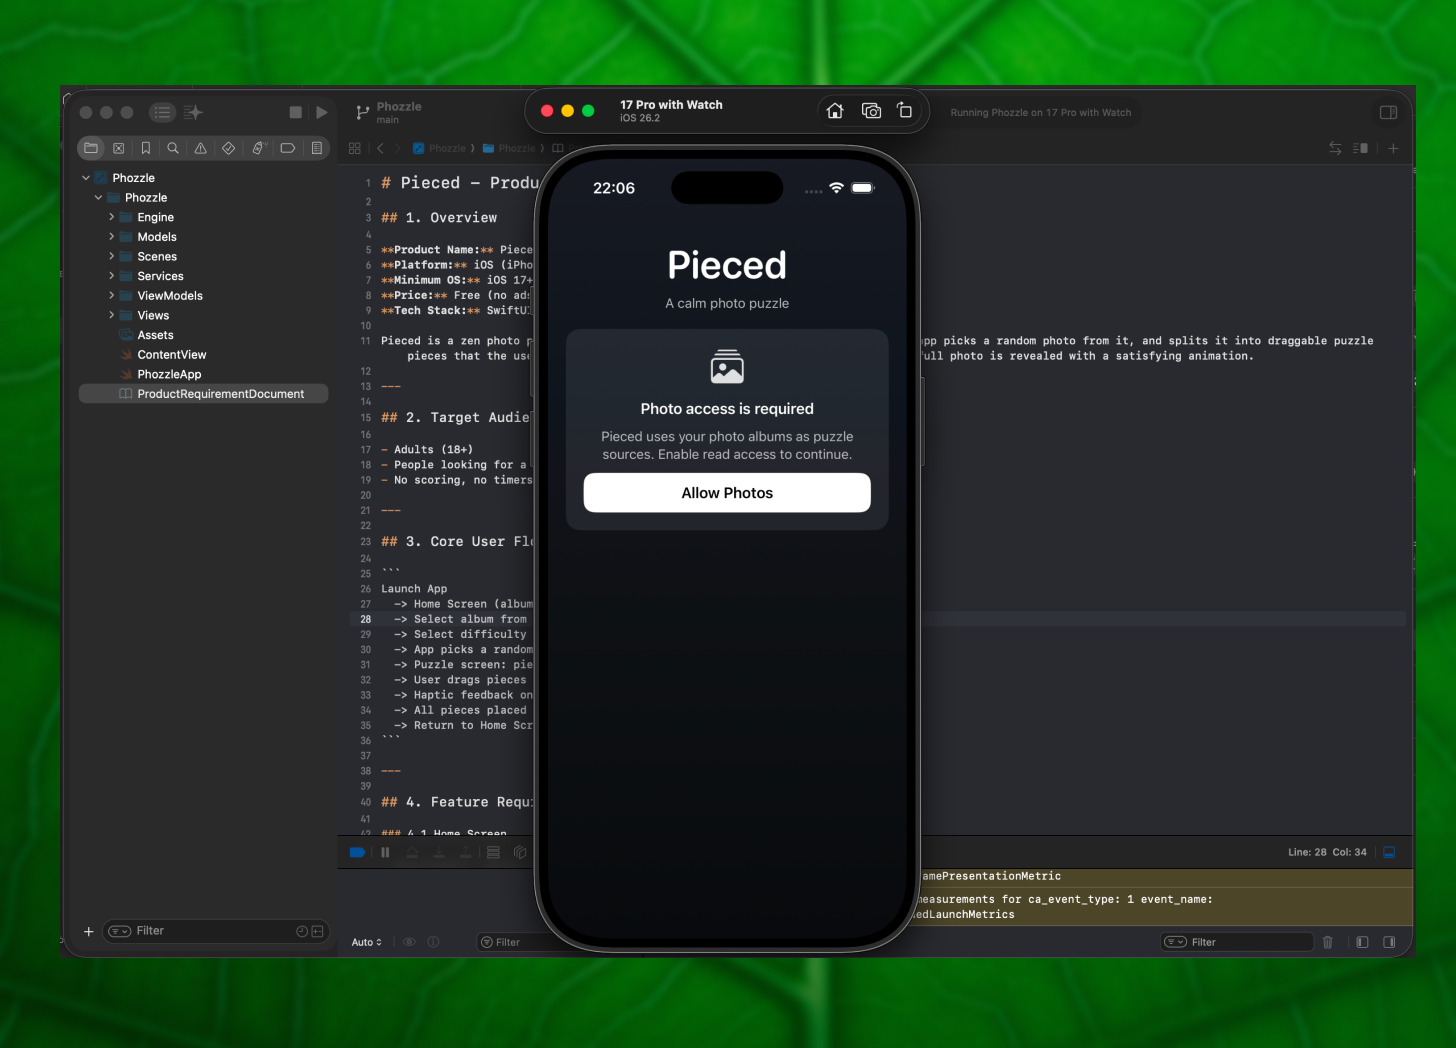
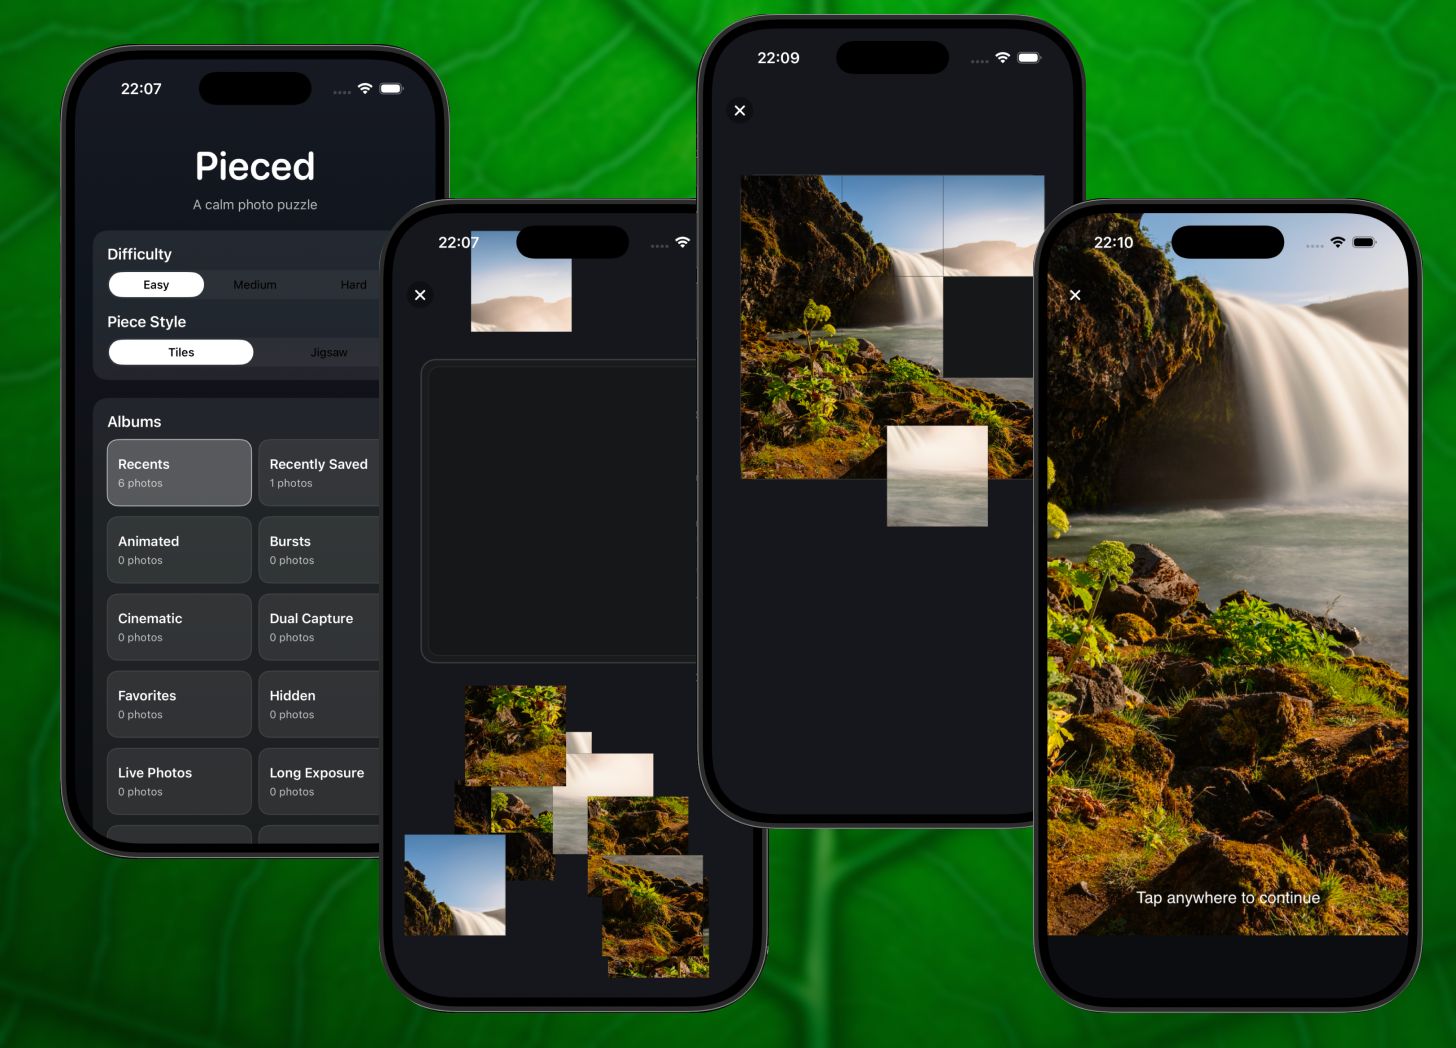
My first version worked pretty well. The UX is a bit janky and the UI is just ok, but you’re able to select the difficulty (number of puzzle pieces), the puzzle style (square or jigsaw), and the photo album on the device if you want to control the photos it selects from.
5. Preview it on your phone
Previewing in the simulator is fine, but if you want to really feel what it’s like to use, putting it on your phone is even better. To do this, you first need to set your phone into developer mode (you’ll find this under Settings > Privacy & Security > Developer Mode). After that, plug your phone into your computer and select it from the dropdown menu in the top centre of Xcode. Then hit the play button again, just like you did for the simulator.
This will create a temporary build on your phone. It will have a default app icon rather than a custom one, but it will open and you’ll be able to use it for up to seven days before you need to rebuild from Xcode.
6. Iterate on it
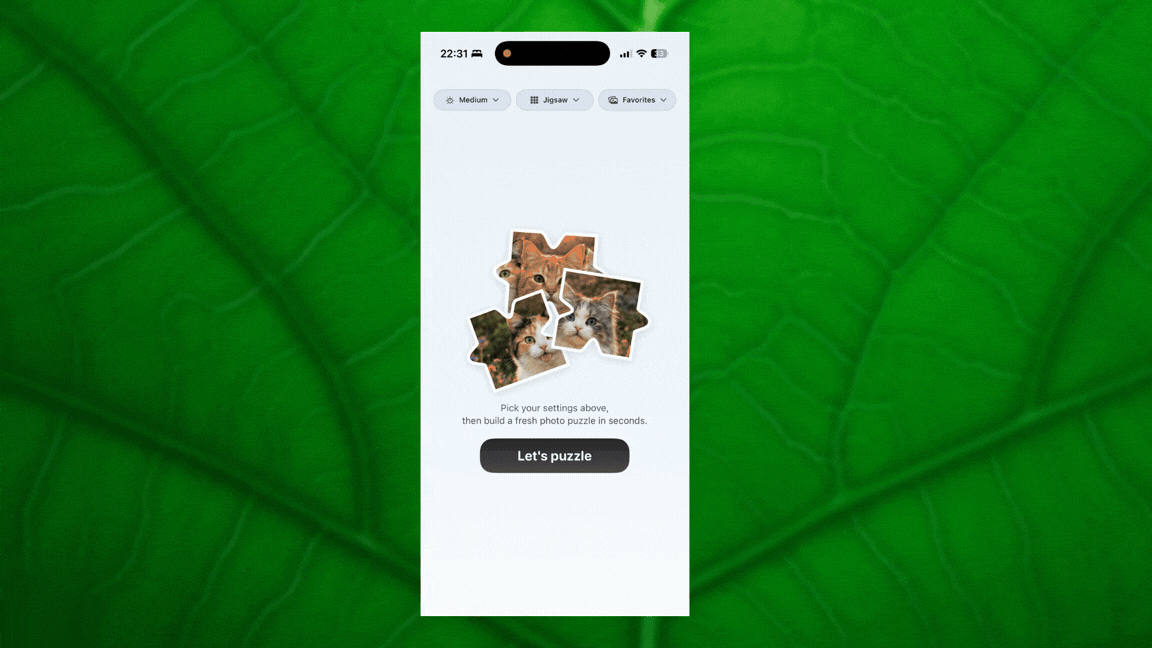
Now that you have your first build, you can decide what you’d like to change. For example, the landing screen on my app wasn’t great, so I wanted to change the difficulty, puzzle style and album controls into dropdowns and create a more appealing home screen.
I first asked the agent to do this: create a graphic with a button underneath, and change the controls into dropdowns. This is a good way to get a general feel for the layout, though the generated graphic wasn’t great. To improve it, I went into Figma and created some puzzle pieces with an AI-generated photo of some animals and brought these into the “Assets” file in Xcode to animate in.
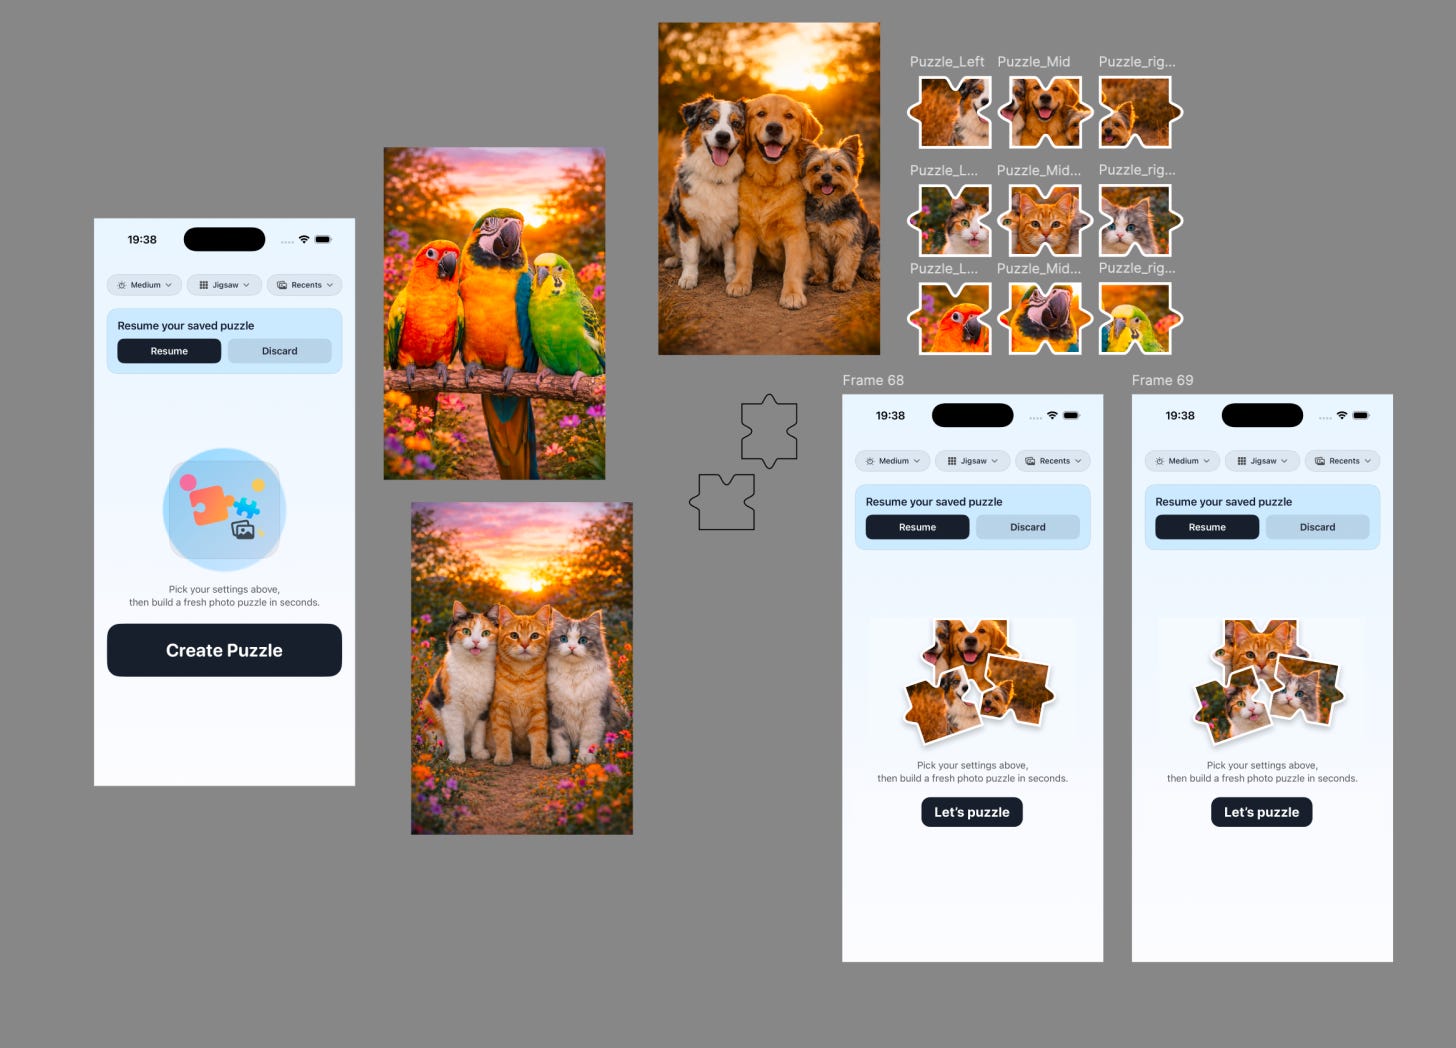
After many rounds of iteration, working through what I did and didn’t like, I got the app into a state I’m actually happy with and really genuinely enjoy using. This includes a confetti explosion when you successfully complete a puzzle, a higher difficulty level, and the location of where the photo was taken shown underneath a framed version of the completed image.
It’s a really nice way to rediscover old photos and trigger memories of all the people I love and the beautiful places I’ve been.
7. Share a test version of the app
If you want to share your app with a friend, this is a little tricker, as this does require an Apple Developer account, which costs $99/year. It’s something you need to apply for with your details and ID for verification, and it can take some time to be accepted.
Once you do have an Apple Developer account, you need to archive your app from Xcode (Product > Archive), then upload it to App Store Connect. From there, you can add your build to a beta group within TestFlight, but before anyone can download it, Apple needs to review it first. This usually takes a day or two, though once it’s approved, you can invite others by email or generate a public link to share.
TestFlight is great for sharing with friends and getting feedback, but if you want to make your app available to anyone, the next step would be publishing it to the App Store. That’s probably worth a whole article in itself, as getting an app ready for submission is a bit more involved.
The whole journey from idea to app on your phone is faster than you’d expect. And once you’ve felt what it’s like to tap an icon and open something you made yourself, it’s hard not to start imagining the next one. Now go build something fun.
This is amazing!!! I’ve wanted to learn how to vibe code for a while, so thank you for making this so easy/accessible!
Thank you so much!!!